APPROPRIATE PAPER-BASED
TECHNOLOGY (APT) (*)
INTRODUCTION
Appropriate Paper-Based Technology (APT) uses materials that cost "nothing" to make something useful. It makes a wide range of strong useful articles from various forms of paper waste. This includes small odd scraps or strips; pages or sheets of paper of any kind; thin card from shoe or shirt boxes; and corrugated card from old cartons. Through APT things can be made without spending any money except what is needed to buy varnish to finish articles.
In countries where this was introduced, particularly developing countries, it was a big boost for designers and makers of assistive devices for disabled people to use a new medium which is in ample supply. Out of discarded paper, devices such as prone boards, walking frames, calipers, hand braces, special chairs/tables, canes, toys and other home gadgets were experimented on and were proved useful.
Local rehabilitation and community workers, including persons with disabilities themselves, can easily see the relevance of APT for many good reasons. Aside from its indigenous appeal, any cost-saving alternative to expensive wood is most welcome. Ecologists predict that at the rate of 400 hectares of trees being cut per year, there will be nothing left at the end of the century.
APT procedures are extremely simple. Imagination and knowledge of the basic techniques convert used paper into strong and attractive devices for persons with disabilities.
APT has the potential to revolutionize the production of asstive devices traditionally fabricated from wood, leather, metal and other expensive media, since it uses waste materials.
As APT uses "free" materials, the technology is made accessible to people and families of all income groups. In Zimbabwe where Beville Packer developed and tested APT extensively, women learned to make utensils such as bowls and simple tools out of paper. A group of school children was later organized to make their own desks. More important than the savings they made, everyone especially the children, experienced a real sense of achievement in the project. Someone very artistic in another country reportedly made good business turning out finely crafted pieces of furniture. This, again, is proof that it can open livelihood opportunities for entrepreneurs with or without disabilities.
A. APT Definition and Characteristics
APT means:
Appropriate: All APT articles are designed to serve some useful purpose.
- APT costs nothing and needs no expensive tools or equipment.
- It is within the range of nearly everyone, of whatever age, to create some APT articles that will be useful and will give pleasure.
- By making many wood-like articles from paper waste, we conserve trees.
- Old unwanted APT article may be recycled as paper waste or reused for further APT production.
Paper-Based: APT uses 99.99 per cent paper or card.
Technology: APT is not a craft for making a certain range of articles. It is a body of knowledge, techniques and devices which can be utilized to make a variety of items.
APT articles have four important characteristics
They should be:
Strong: Strength is essential for usefulness especially if it is a furniture item. Even if it is made of paper and other waste materials, it is durable because of the technology applied, considering the intrinsic characteristics of paper or card.
Useful: APT articles are useful because out of paper waste and other trash materials, different products can be produced. They range from simple tools to household wares and furniture, and assistive devices for persons with disabilities.
Attractive: Paper waste, combined with other earth shades, create artistic designs and good colour combinations that suit each individual.
Low-cost: The cost of production is very low since APT uses simple or improvised tools for producing articles which are made from paper waste and other waste materials.
B. Materials and Tools Used in APT
Waste Materials:
- Paper: e.g., used cardboard/corrugated board, folders and envelopes; boxes; cement bags; old posters, newspapers and magazines; used gift wrappers or colorful magazines/papers for finishing (optional)
A wide range of strong, useful materials from various forms of paper waste may be used. Thus, it is important to know the following characteristics of paper which are relevant in this technology:
- Grain. To recognize the grain, tear a paper. If it tears easily into a straight line, it is along the grain.
- Thickness and thinness.
- Absorbency.
- The stretch/shrink factor. All papers and cards swell and stretch as they are penetrated by moisture of paste, water or very humid air. As the materials dry, they contract and exert a very strong pull. This pull is strongest when the material is finally drying right through. Shrinking, unless properly allowed or controlled, causes twisting and warping. Once there, this can be very difficult to correct or may make an article useless.
- Paste: e.g., leftover flour, corn starch or "gawgaw" or making paste
For APT, the paste used is made of flour, corn starch or "gawgaw" mainly because of the following reasons:
- When well made, it is a strong paste for sticking paper and card. It penetrates both surfaces and so really bonds them together.
- Being a wet paste, it softens the paper or parts to be joined and they can be easily crushed, rolled, bent, and moulded as desired.
- It costs less compared to commercial adhesive.
- It is a clean adhesive and does not harm the hands and can be washed off from clothing, floor, or table surfaces.
Remember that flour paste is not a contact adhesive. It needs pressure to do its job. For easier recall, Packer coined the following slogan. "2Ps spell STICK" which means Paste + Pressure = Stick.
-
Used Stockings
Used stockings which are non-biodegradable is essential to APT mainly because it is identified to be the most durable string for connecting and tying processed pieces.
-
Dried Leaves/Flowers; Sequences; Glitters; Leftover Paints or Varnish; Charcoal, Moss and Other Earth Colours Available in Your Surroundings
For finishing and aesthetic purposes, paste can also have a variation of colours. To do this, we suggest the mixing of charcoal, moss, glitters or other earth colours found in your area, depending on the type of colours that will suit your taste. On the other hand, dried leaves/flowers, sequences or other colourful papers will enable you to create alternative designs of your manufactured products. Left-over paints and varnish will protect your materials from moisture, making them more durable and of better quality.
Tools Needed
- For cutting cutter, scissors.
- For marking pen, pencil, markers.
- For measuring rulers or similar tools; protractor or other improvised tools/objects for making round patterns.
- For piercing or making holes icepick, nails, drilling equipment.
- For tube-making water pipes, PVC, or any smooth, cylindrical-shaped object.
- For pressing boards sacks of sand or any heavy objects or furnitures. Your work table can also be used for pressing boards.
- For finishing paint brush, preferably 1" thick for small articles and 3" thick for bigger articles.
- For paste preparation ordinary stove, kettle, ladle, pail/basin or any other container.
Remember some of the basic techniques and processes that are important in this technology:
- The time factor: Try to manage your work in order to save time.
- Tearing and cutting: Whenever possible, tear paper and card. DO NOT CUT THEM. Tearing is usually quicker. Tearing leaves a bevelled edge that sticks down firmly.
- Folding: Remember the grain. Fold along the grain.
C. Basic Steps Used in APT
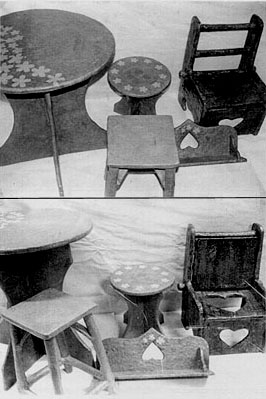
The basic APT procedures such as measuring, pattern-making, laminating, layering, assembly and finishing can be shown step by step in making a small chair for a child. This will also demonstrate Packer's combination of "classic" and "utility" style shown here. Classic-style furniture is made of tubes like the legs of a stool. Utility style uses solid or massive pieces of cardboards for heavy-duty articles like the chair we will make.
1. Basic APT Procedures in Making a Chair for a Child
In making an APT article, it is important to think and design first, based on the user's requirements. The finished product should always have the four basic APT features; usefulness, strength, affordability and attractiveness.
(A) Measurement
An accurate measurement of the object you intend to make is necessary to ensure that it will best fit its user or purpose. For our chair, the steps are as follows:
1. Ask the child you are making the chair for to sit down. A straight ruler or metal tape is easier to use than a measuring tape which bends. You are measuring for a furniture item, not an appliance. Take and record the following measurements (in inches):
- (a) Height of the backrest;
- (b) Length and width of the sitting board;
- (c) Height from the seat to the floor.
(B) Pattern-making
Pattern-making helps you to cut the article pieces more accurately and minimizes wastage of materials. Using our example, (a) = 21 inches, (b) = length: 12 inches & width: 12 inches and (c) = 11 inches:
- Prepare the two sideboards using (a) and (b) measurements. On an old cardboard, draw patterns #1, and #2 for the sideboards and sitting board as illustrated.
 Trace pattern #1 on your cardboards. Since you will need at least 8 pieces pressed and pasted together to make a half inch thick board, prepare enough for 16 pieces for both sides. In tracing your pattern, make sure that you will have 8 pieces with vertical corrugation and 8 pieces with horizontal corrugation as illustrated. (This will be explained further in the lamination stage). The holes are for the tubes to serve as the backrest which will be shown later.
 Trace pattern #2 on your cardboards, making 4 pieces with vertical cor-rugation and 4 pieces with horizontal corrugation as in step 1. In cutting the pieces, be sure they are of the same size, to have neat and smooth edges later.
(C) Lamination
This is the pasting together of the pre-cut cardboard pieces (based on your pattern) that will be one part of the article being made.

- To prepare board #1, paste eight pieces with alternate corrugation. This will prevent wrinkling and curving while drying. Using a roller or a heavy object, paste one by one with the flour paste, pressing out the air to make it more solid and airtight. You can also step on it but be careful not to soil or deform it. Since you need two boards for the sides, repeat the procedure using the remaining 8 pieces.
 To prepare board #2, paste eight square pieces with alternate corrugations as in step 1.
- To make the three pieces as airtight as possible, press them overnight using a heavy object such as a sandbag, a boulder or putting them under heavy furniture, e.g., a table turned upside down, or a sewing machine. Make sure the article is protected from the heavy object with a flat board to keep it straight and smooth.
 After pressing and drying overnight, seal all sides with small pieces of hand-torn paper, using flour paste.
- Leave the pieces to dry in preparation for layering.
(D) Making the tubes
In making the tubes, thin cards are preferred, e.g., cake boxes, cereal boxes, used brown folders and other similar materials.
- Prepare the roller using either a PVC pipe or a smooth wooden handle about 3/4 to 1 inch in diameter. This should always be 6-8 inches longer than the tube you need to make. Following the width of the sitting board, the five tubes needed here should each be 12 inches long, with 1 inch allowance (PVC each should be 11 inches + 1 inch allowance).
 Get a piece of used brown folder with at least 11 inches length. Determine its grain by tearing one side. After knowing the grain, place the cardboard on a flat surface. With a PVC pipe and following the grain, roll the cardboard into a tube. The smaller the diameter of the roller, the thicker and more durable the tube will be.
- Remove the PVC pipe from the tube before it dries up inside.
 Seal the loose ends using our basic 'plaster' torn into long strips and the flour paste. To make the 'plaster': (a) paste and press three pieces of paper with alternate grains; (b) while wet and soft from the flour paste, tear into long strips.
 To make the tube more durable fill it with crumpled pieces of paper with the flour paste
 Leave the tubes in standing positions overnight for drying.
- After drying, mark each tube using the width of the seat board and the allowance.
 With a coping saw or a cutter, cut the tube ends and bend using a hammer as shown in the drawing.
(E) Assembly
After laminating the needed pieces for the chair and preparing the tubes, they are now ready to be put together.
- Place one sideboard flat on your working table or floor. Fit the correct end of each tube into the holes as shown in the picture.
 Place the second sideboard in position, guiding each tube in the corresponding holes as illustrated.
 With the chair in an upright position, put the seat board and use it to adjust your sideboards and tubes according to your measurements. Press and adjust the parts until the chair is firm and stable. To make it even, view it from a distance of approximately one meter.
- Turn the chair upside down to mark four points where the seat board can be tied to the tubes underneath.
 Take the seat board out and using a borer or a big nail, make holes where the nylon stockings can be inserted when the seat is joined to the tubes.
 After making the holes, put the seat board back and press down hard to make sure it is back to its original even position. With a nail or a stick, tie the board to the tubes using a strip of nylon stocking about 1 inch wide and 8-10 inches long. Make sure they are tightly fastened and the knots are hidden under the seat, otherwise, the lumps will make the chair uncomfortable to sit on.
 After tying the four corners of your seat board to the body, put one side down. With a hammer, press the four ends of your tubes to the board as flatly as you can. During layering, these bumps should be concealed and flattened.
 After pounding on all the tubes, make the chair stand. Again, check if it is straight, stable and even before layering. If possible, ask the child to sit on it to check on its strength.
(F) Layering
Layering is the overlapping pasting or covering of the outer surface of the article being made using small pieces of paper torn by hand. Tearing leaves a bevelled edge that sticks down firmly. The smaller the pieces, the more durable the layer will be. It may be small squares or strips of used craft paper, which is usually used for cement bags, brown envelopes and other similar materials. Preparing your pieces of paper in advance will help speed up your layering.
Five courses in thick layering:
- (a) Criss-cross;
- (b) Horizontal;
- (c) Vertical;
- (d) Diagonal 1;
- (e) Diagonal 2.
 Layer the more difficult and hidden parts of the chair first. In all layering, moisten and stretch the surface of the part to be layered. Also, work with pasty hand, always pressing and massaging your work to make sure the pieces are pasted flatly. Big and wide pieces tend to come off as they dry and shrink. Remember Packer's formula, "paste and press = stick". This is to maintain the woodlike quality of the chair.
 To layer the sides where the tube ends protrude, use cross layering with long strips of paper to make them more secure. Layer more thickly to cover the lumps.
 Make corners neat. For all "tidying work", layer precisely, planning the size and shape of the pieces you need to give a neat and smooth appearance. Tear into smaller pieces so that they lie quite flat over corners.
- Finish your layering as quickly as possible so that it all contracts together and dries like a piece of wood without soft spots or wrinkles.
(G) Finishing
This is done by varnishing the final layer of the whole article. Creativity plays a very important role here. As mentioned earlier, for those who prefer woodlike texture and colour, craft paper may be used. There are however many options. For our chair, for example, which is for a child, attractive papers may be used gift wrappers with cartoon characters or even colored magazines. The same layering technique may be applied.
- Line your table or floor with old newspapers or papers to protect it from varnish stains. Apply natural varnish with a paintbrush. It should neither be too thick nor too thin. After one layer, leave it to dry.
 After drying, apply another layer and so on, making sure it is dry before the next application. Three layers are usually adequate. The varnish will make the chair waterproof and safe from insects.
- After drying, the chair is now ready for use. Remember to clean your brush with thinner.
Following are some Suggested Articles to be Made
* Source: Based on National Council for the Welfare of Disabled Persons. 1996. Quezon City, Philippines. Handbook on Paper-Based Technology: How to Make Assistive Devices, Home Decors, Furnitures and Novelty Items Out of Used Papers.
Go back to the Contents
ECONOMIC AND SOCIAL COMMISSION FOR ASIA AND THE PACIFIC
Production and distribution of assistive devices for people with disabilities: Supplement3
- Chapter 4 -
ST/ESCAP/1774
UNITED NATIONS PUBLICATION
Sales No. E.98.II.F.7
Copyright c United Nations 1997
ISBN: 92-1-119775-9