Nothing About Us Without Us
Developing Innovative Technologies
For , By and With Disabled Persons
Part Two
CREATIVE SOLUTIONS FOR WALKING
AND FOR LEG AND FOOT PROBLEMS
CHAPTER 12
Leg-Braces for Noe:
from Old Plastic Buckets to Polypropylene
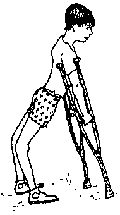
NOE was a cheerful boy with "diplegic" cerebral palsy (meaning that mainly his legs are affected). When he was 5 years old he learned to walk with crutches, but with a lot of difficulty. He stood very stiffly on his slender, spastic legs. The tiptoe (equinus) position of his feet pushed his knees backward (recurvatum). As he grew bigger, his knees bent farther and farther back. When he was 8, a specialist in the city prescribed full-leg metal braces with orthopedic boots. Noe wore them for a while, but hated them. They were heavy and awkward and slowed him down. He protested so much that after a few months his parents gave up trying to make him wear them. The backward bend of his knees gradually grew worse and he began to complain of knee pain. When Noe was 10, his family learned about PROJIMO and took him there.
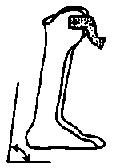
The team realized that if Noe kept walking with his knees bending so far backward, the ligaments (cords) behind the knees would stretch more and more, until walking would become impossible (see page 128). Perhaps if his feet could angle up slightly (preventing tiptoeing) he might be able to walk without his knees bending so far backward. Light-weight, below-the-knee plastic braces might serve the purpose.
When Noe first came in 1981, PROJIMO was just beginning and they had not yet begun to make plastic braces. Although plastic braces were available at large rehabilitation centers in the cities, they were very costly (around US$200 for a single below-the-knee plastic brace). The PROJIMO team decided to experiment with low-cost methods to make plastic leg braces.
Braces made from Plastic Buckets
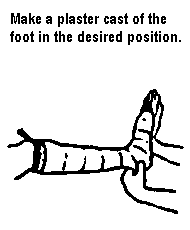
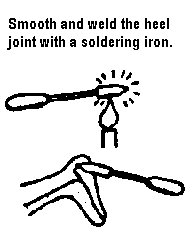
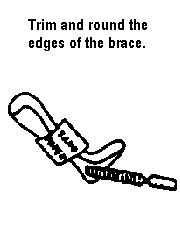
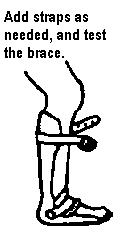
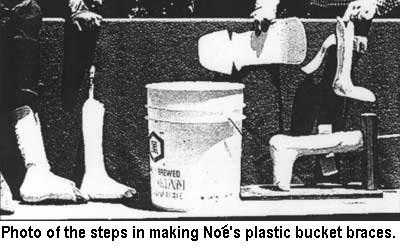
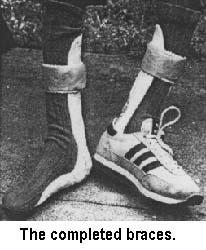
PROJIMO had been given some old plastic buckets (that once held soy sauce for restaurants). They experimented with heat-molding pieces of the bucket over plaster casts of Noe's feet. At last they developed a method that gave fairly good results. The basic steps (explained in more detail in the book, Disabled Village Children, Chapter 58) are shown below.
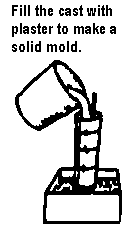
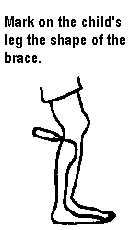
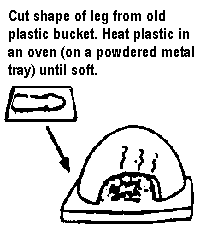
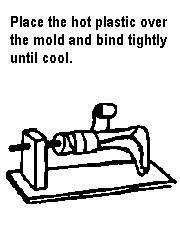
Results of the Plastic-Bucket Braces
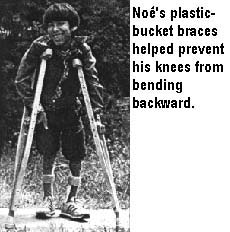
The below-the-knee plastic-bucket braces did, to some extent, help Noe to stand straighter, with his knees bending back much less. However, when he walked rapidly with a swing-through gait, his knees still bent backward.
The biggest problem with the plastic-bucket braces, however, was that with a child as big and active as Noe, the braces did not last long. They developed cracks and broke within a few weeks.
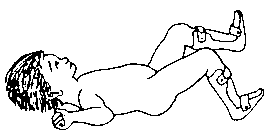
However, the plastic bucket braces have proved effective for maintaining a good position of a baby's club feet after the clubbing has been corrected - and for other situations where a child does not walk yet, or puts little stress on the braces.
Polypropylene Braces
Although plastic-bucket braces met some needs at very low cost, for Noe and many persons, stronger plastic was needed. Polypropylene, which is used by professional brace makers, is strong and easier to heat-mold than many other plastics. because it is available in large sheets in a near-by city, PROJIMO began to use it. They made full-leg braces for Noe in the following manner:
|
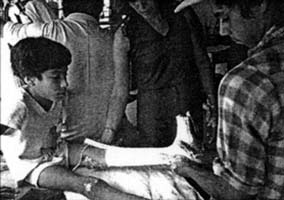
1. Marcelo takes a plaster-cast of Noe's leg. From this, he will make a solid plaster mold. |
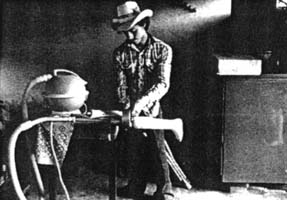
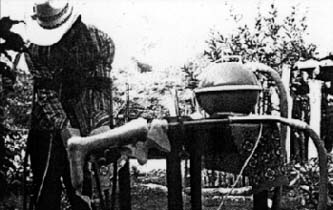
2. To avoid bubbles forming under the plastic, he attaches the leg mold to a vacuum cleaner to suck out the air from under the hot plastic. The plastic sheet is being heated in the metal box on the stove (right). |
|
3. He stretches the soft hot plastic over the mold. After it cools, he will cut the plastic to form the brace. |
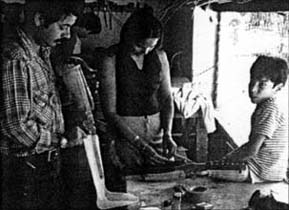
4. Roberto, assisted by Noe's mother, attaches the plastic lower leg piece to the upper leg piece with jointed metal bars. (Here, the upper leg piece was made with leather. Later, the leather was also replaced with plastic.) |
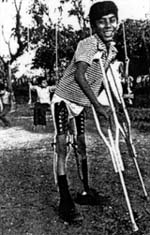
Noe was delighted with his new plastic braces. They were light, comfortable, and kept his knees from doubling backwards. He is now a grown man, but continues to use them, returning to PROJIMO every 2 or 3 years for new braces or repairs.
Different Approaches to Making Plastic Braces and Artificial Limbs
Although many programs in the Third World have made no effort to use plastics, others have made good use of plastics, overcoming many obstacles in order to do so:
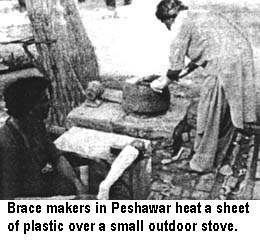
In Pakistan, where polypropylene is hard to obtain, a community rehabilitation program in Peshawar made braces from the plastic windows of wrecked buses. Instead of an oven, they use a small mud stove full of hot coals. (An electric blower was used to keep them very hot.) The brace makers use pliers to hold the plastic over the stove, moving the plastic back and forth to heat it evenly. (They find they get better results this way than in an oven without a thermostat.)
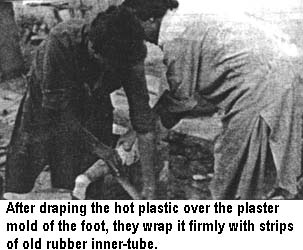
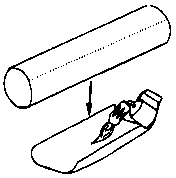
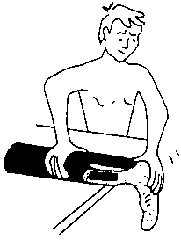
To save on the short supply of polypropylene plastic, the Peshawar workers often mold only the foot-piece out of these. They use plastic PVC pipe for the upper part of the brace. This they heat just enough so that it can be spread to fit the shank of the leg. (If heated until it is quite soft and moldable, PVC, like many plastics, tends to crinkle like bacon.)
The molded foot and PVC leg are then riveted or laced together.
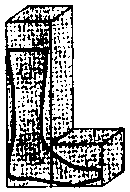
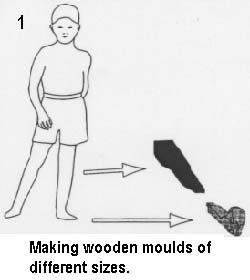
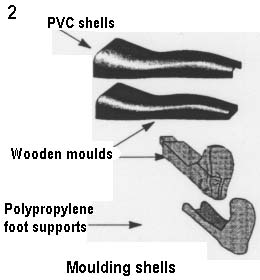
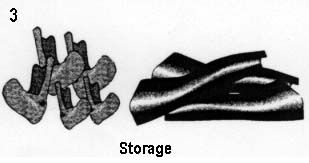
In India, the Gandhi Rural Rehabilitation Center near Madras also combines the use of PVC legs and polypropylene feet. They have simplified and reduced the cost of braces by using pre-molded polypropylene components. They make these in advance, and keep a stock of components in a range of forms and sizes. The components are made by molding the plastic over wooden legs and feet of different sizes.
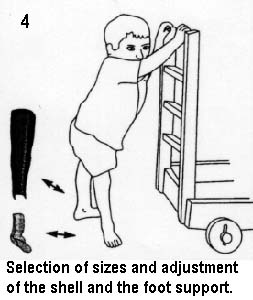
This way, they do not need to cast the leg and make a mold for each individual child. The cost of plaster bandage is avoided. (Ironically, this is one of the highest material costs in making plastic braces). Also, fitting is quick. When a child arrives, his needs are evaluated, measurements are taken, components are selected, and the brace is assembled.
The disadvantage to using pre-made parts is that the brace often does not fit the child precisely. The exact fit of the individually-molded brace is lost. I saw several children with these pre-formed braces who had blisters and callouses (especially over the ankle bones), resulting from an imperfect fit.
Never-the-less, with time and patience, most problems can be corrected. Spots that press on bony areas can often be re-heated and pushed out enough to relieve the pressure.
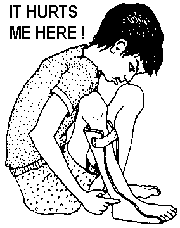
The most important part of fitting braces is to establish a friendly, trusting relationship with the child. Let her know you want her to make suggestions, and to tell you when something bothers her or hurts. When you include the child as a partner in problem-solving, the results are more likely to meet the child's needs.
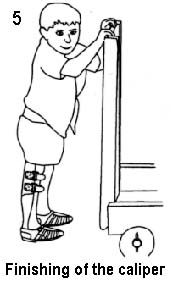
A useful book on low-cost brace-making, called A Plastic Caliper for Children, has been prepared by Handicap International (HI). The book includes many innovations, including the combined PVC and polypropylene braces made at The Gandhi Rural Rehabilitation Center (The Center is assisted by HI.) The steps involved in making braces with pre-formed component parts is summarized at the start of that book as follows:
Steps in manufacturing plastic calipers
|
A Plastic Caliper for Children, written by HI staff at its Pondicherry, India branch, is available through Handicap International. (For the address, see Resource List 2, page 344.)
Nothing About Us Without Us
Developing Innovative Technologies
For, By and With Disabled Persons
by David Werner
Published by
HealthWrights
Workgroup for People's Health and Rights
Post Office Box 1344
Palo Alto, CA 94302, USA

