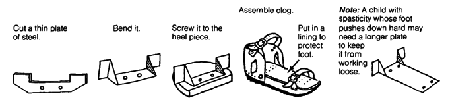
Disabled Village Children
A guide for community health workers,
rehabilitation workers, and families
PART 3
WORKING IN THE SHOP:
Making Sure Aids and Procedures Do More Good than Harm
CHAPTER 58
Braces (Calipers)
Braces are aids that help hold legs or other parts of the body in useful positions. They usually serve one or both of 2 purposes:
|
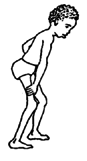
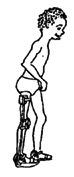
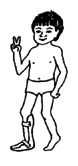
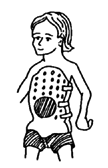
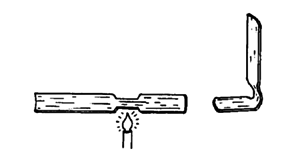
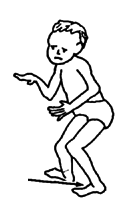
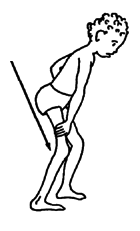
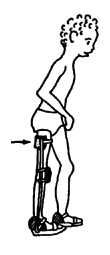
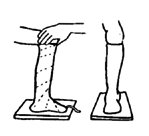
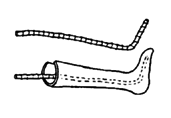
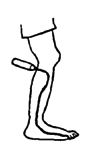
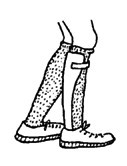
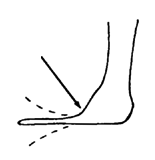
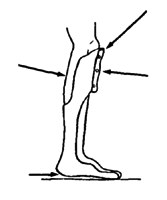
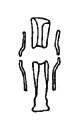
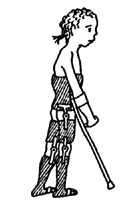
1. To provide support or firmness to a weak joint (or joints). For example, this child had polio: |
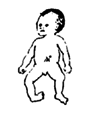
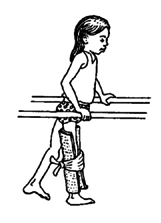
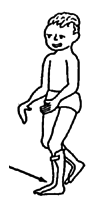
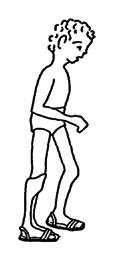
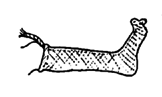
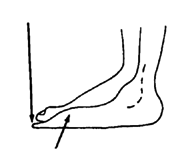
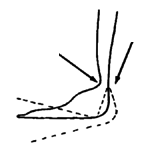
2. To help prevent or correct deformity or contracture. For example, this child had a club foot: |
|||
|
His leg is too weak to support his weight without help. |
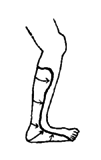
This brace keeps his knee from bending forward . |
He was born with a club foot. |
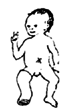
His club foot was corrected with a cast. |
After correction, his foot is kept in a good position with a brace. |
|
CAUTION: The need for braces should be carefully evaluated. Braces should be used only if they will help the child move better and become more independent. Too much bracing may actually weaken musclesand cause greater disability. As a general rule, try to use as little and as light bracing as possible to help the child function better. (See Chapter 56.) |
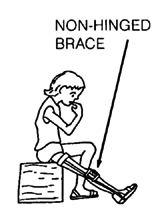
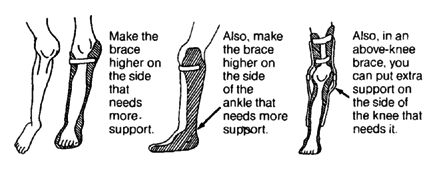
Different braces for different needs
The main lower-limb brace types are:
|
Foot brace 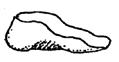
usually made of molded plastic 
for deformities in the foot (not ankle) such as severe flat foot. |
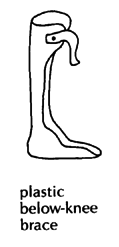
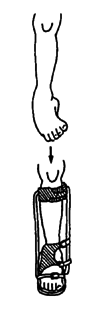
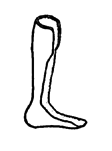
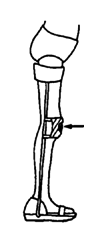
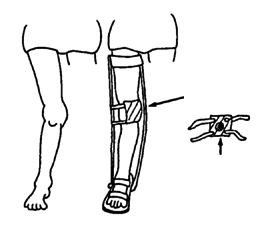
Below-knee braces (ankle brace) for weakness or deformities in the lower leg, ankle, and foot. |
|
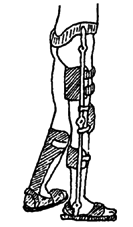
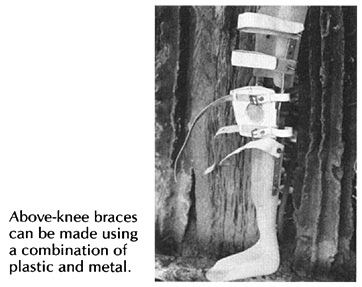
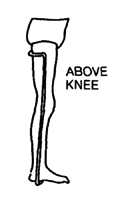
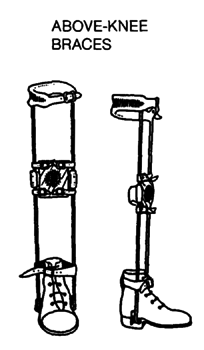
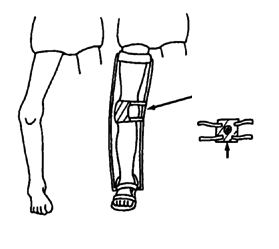
Above-knee brace (long-leg brace) for weakness in the upper leg and knee - possibly also ankle and foot. |
Above-knee brace with a hip-band for severe weakness in hips and legs
|

Less commonly used types (described on Page 547and Page 558) include:
|
Leg-separating braces 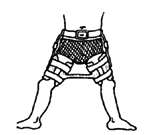
for dislocated hips or damaged head of thigh bone (See Page 158.) |
Foot-positioning night brace for holding the feet, legs, and hips at a set angle when they tend to turn in.
|
Body brace or corset for curve of the spine.
|
Body brace with leg braces 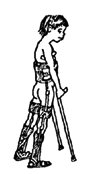
for body and back weakness together with hip and leg weakness. |
Different materials and ways to make braces
As we discussed in Chapter 56, an ideal brace should:
- serve its purpose well (help the child walk or function better)
- be comfortable
- be lightweight yet strong
- be as attractive as possible
- be easy to put on and take off
- do no harm
- be low cost
- be easy and quick to make with local tools and limited skills
- use local or easily available materials
- be easy to repair and adjust as the child grows or develops
- be long lasting
Unfortunately no brace will meet all these requirements. As much as possible, try to put the child's needs first.
In this chapter we give ideas for making different braces using various materials. When deciding how to make a brace, carefully evaluate both the child's needs and the available resources (see Chapter 56).
|
Sometimes it is wise to start with a simple low-cost temporary brace or splint to see how well it works and what the problems are. |
Keep old and outgrown braces for testing on new children before final braces are made. But take care not to discourage the child by making him use braces that do not fit him well. |
Examples of very simple, low-cost braces and splints:
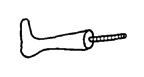
A temporary leg splint of cardboard, folded paper, or the thick curved stem of a dried banana leaf, or palm leaf.
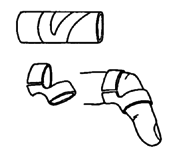
Aluminum tube finger splint
Mango seed finger splint
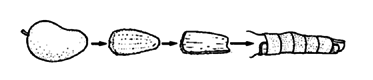
Remove the woody coat of a mango seed, and wrap the coat firmly onto the finger. It will dry into a firm splint. To change its shape, first soak it in water.
Bamboo ankle splint
A piece of seasoned bamboo can be heated and bent.
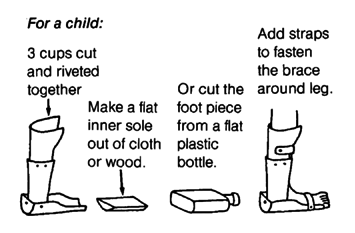
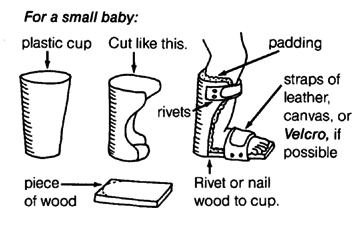
Plastic cup ankle braces for night or temporary use on a small child.
|
|
|
Metal or plastic braces
Modern, high-quality braces are usually made out of metal or molded plastic.
The best metal is a mix or 'alloy' of aluminum and steel which is both light and strong. However, this is very costly and often hard to get. Pure aluminum is very light, but breaks easily, especially when you try to bend it. Steel is cheaper and easier to bend and weld, but is much heavier.
The best plastic for braces is probably polypropylene, which is strong, light, and fairly easy to shape when hot.
Pre-formed metal parts for making these braces are sold at orthopedic supply stores. Unfortunately, they are usually much too expensive for a community program. However, sometimes you can get large orthopedic centers to donate old braces, from which locking knee joints and other pieces can be used to build high-quality metal or plastic braces. Also, many broken or outgrown braces are lying in the corners of thousands of homes. A campaign to get families to donate these can greatly reduce the costs of making high-quality braces.
Low-cost metal or plastic braces can be made in a village shop. They can be made simply, with or without joints. Since children grow quickly, they often need a larger brace every 3 to 6 months. Therefore, keeping cost low and work simple is essential. (See Chapter 56, Page 527.)
Metal and plastic braces each have advantages and disadvantages. We discuss these on Page 542 and 550.
In Mexico, we have found that for most children who need below-knee braces, plastic works best. And the children (and parents) like it more.
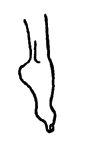
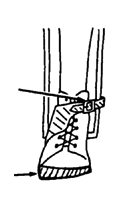
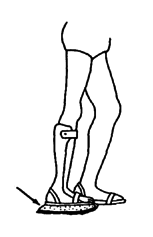
However, a child with a lot of muscle tightness (due to spasticity or contractures) which pulls his foot a lot to one side, like this,
may need a metal brace with an ankle strap. After the brace is on, the strap is tightened to pull the foot into a better position.
|
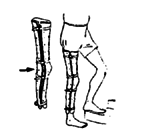
Whenever possible, equip your village shop to make both plastic and metal braces. That way, you can make what seems most appropriate for each child. |
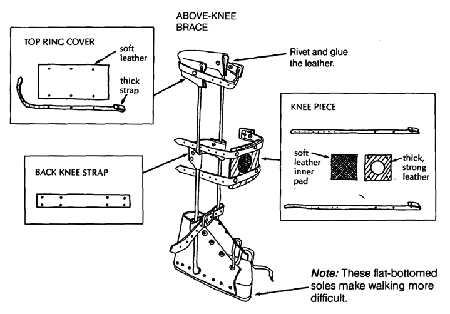
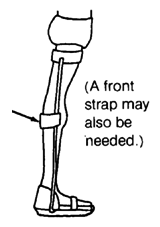
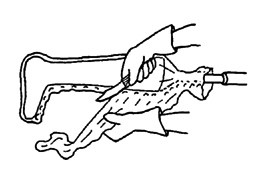
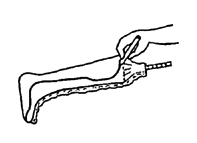
FITTING PLASTIC OR METAL BRACES
IMPORTANT: Correct measurements are essential for a good fit.
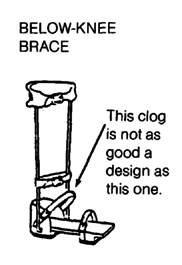
Below-knee brace should reach almost to knee, yet allow knee to bend all the way.
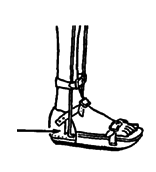
Brace or clog should grip heel and ankle closely.
Above-knee brace should reach to about 2 cm. below groin.
Upper part of leather or plastic of brace should fit around the thigh closely.
Knee hinge (if used) should be at the middle of the knee, both in height and from front to back.
Side pieces should be close to knee but not touch or rub the child when he walks.

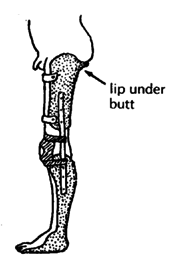
If the leg is very weak or joints are damaged, the top of the brace can have a lip on which the butt rests, to bear part of the body weight. (For design, see "Artificial Legs," Page 633.)
|
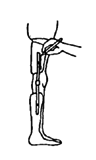
KNEE PIECE 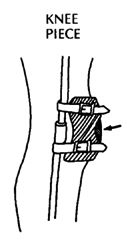
Soft part of pad sits directly over kneecap. |
HINGE AT ANKLE LEVEL 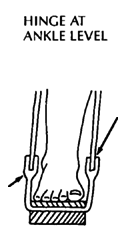
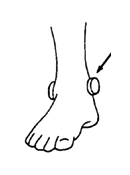
Ankle hinges, if used, should be at the level of the bony lumps of the ankle. Note: A brace with a hinge at ankle level is better than one with a hinge at foot level because it bends at the same height as the ankle joint. (However, a metal brace with ankle hinge is more difficult to make.) |
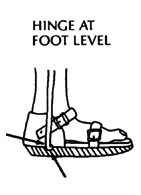
HINGE AT FOOT LEVEL
Side rod should attach at a point directly below the midline of leg. |
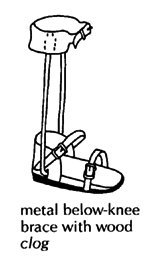
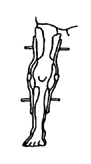
METAL BRACES
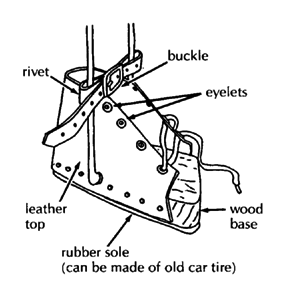
The advantages of simple metal braces are that they are quick, easy, and cheap to make. They often last longer, and, if used with sandals or clogs, in hot weather they are cooler than plastic. However, they also have disadvantages: because a shoe, sandal, or wood 'clog' must be built or attached to the brace, there is additional work and cost. Also, they are heavy, clumsy, and more noticeable. In hot or wet weather, leather or cloth, or even the metal starts to rot. Shoes or boots which the child cannot change, even when they get wet, begin to stink.
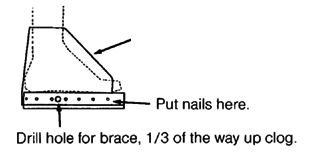
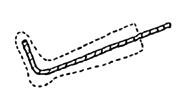
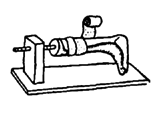
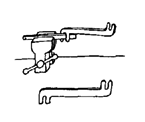
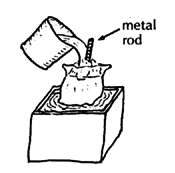
METAL ROD BRACES* using 're-bar' (reinforcing rod for use in cement building construction)
For a brace shorter than 50 cm. (20 inches) you can use rod that is 5 mm. thick. For a longer brace, the rod should be thicker- up to 8 mm.
|
|
|
|
|
These improved clog designs make walking smoother (see Page 544).
|
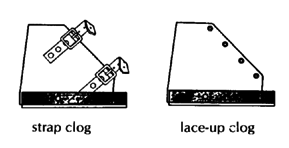
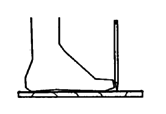
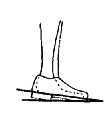
SHOES AND CLOGS FOR METAL BRACES
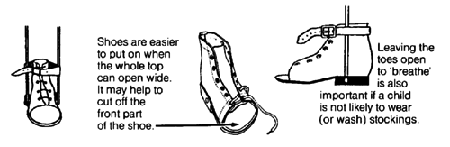
High-top leather shoes often work best, especially in communities where children usually wear shoes.
For adding thicker soles and making other changes, it helps to buy shoes with soles that are sewed on. (Today, many shoes have plastic or rubber soles that are glued on or molded with the shoe. These are much harder to work with.)
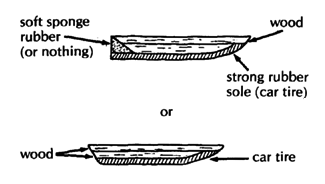
Unfortunately, leather shoes are costly. Also, they may not last long in rain and mud. So, you may want to make simple, low-cost wooden-soled shoes, or clogs. This design is from Simple Orthopaedic Aids.
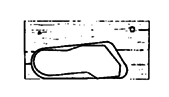
1. Draw around the foot on a piece of wood about 2½ cm. thick. Be sure to use a wood that is not likely to split.
2. Leave extra space as shown (to allow for child's growth). Cut out the piece of wood.
3. Carefully draw this shape on a piece of paper, using the length of the clog as a guide. Then cut it out.
4. Now draw both sides of leather top. Between the 2 sides add the width of the clog.
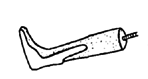
In communities where most children go barefoot, a disabled child may prefer more open clogs. This design is adapted from Huckstep's Poliomyelitis, and the Jaipur Sandal'.
Note: These open clogs are hard to fit on deformed feet or feet with tiptoe contractures. In such cases, high-top clogs or boots work better. Or use plastic braces molded to fit the foot.
HOW TO CONTROL UP AND DOWN MOVEMENT OF FOOT
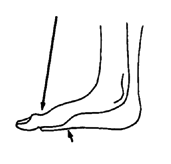
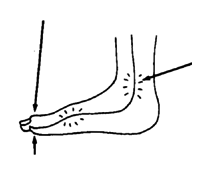
CONTROLLING FOOTDROP AND TIPTOE DEFORMITIES
|
A child with 'footdrop' or a floppy foot that hangs down so that she has to lift her leg high with each step, |
needs a brace that holds the foot up. Use a plastic brace. |
or a metal brace with a backstop that lets the foot bend up, but not down. |
Making a backstop
Toe-raising spring
|
Another way to help prevent footdrop is with a toe-raising spring. |
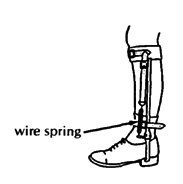
This is a more complicated design |
This is a simpler design.
|
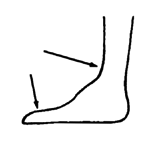
CONTROLLING FOOT-RISE AND UNWANTED KNEE-BEND
|
A child who walks with knees bent and feet bent up, |
may (or may not) be helped by a brace that prevents the foot from bending up s much. If possible, use a stiff plastic brace. |
|
Or use a metal brace with a stop placed in front of the upright bars. |
A strong stop with a long plate will be less likely to work loose or damage the clog.
|
|
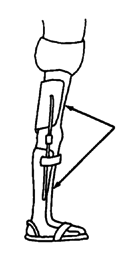
A child whose weak leg bends at the knee when he tries to put weight on it.
|
may need an above knee brace.
|
|
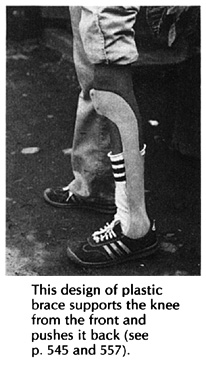
But sometimes a below-knee brace that stops the foot from bending up will help push the knee back enough so that the child can support his weight on it. (See Page 557.) The brace can be of stiff plastic, or metal with stops to Prevent foot-rise.
|
If a brace with an ankle joint is used to prevent the ankle from bending up, the base piece will need a long, strong, forward plate.
The joint can be adjusted to allow only the desired range of motion. |
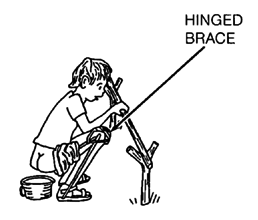
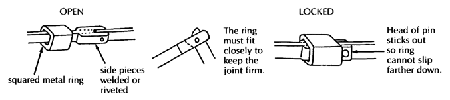
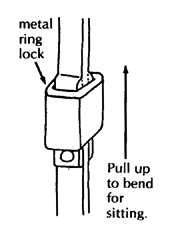
KNEE HINGES
Braces with locking knee hinges permit the child to bend her knees for sitting or squatting.
|
Non-bending knees are satisfactory for most children. The child can sit with her leg straight. |
However, in some communities, a child may 'fit in' better if he can squat. However, hinged braces have disadvantages: they are more costly and take longer to make. A child outgrows them quickly-unless they are adjustable. So use your judgment.
The knee hinge locks for walking and unlocks for sitting or squatting. |
Hinges on a round-rod brace
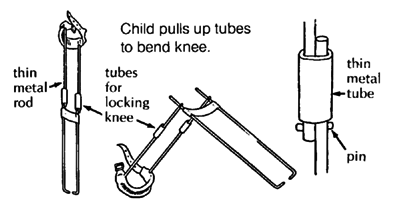
A BETTER HINGE
A simpler hinge such as the ones above for a round rod can also be used on a flat rod.
A hinge for flat metal bar
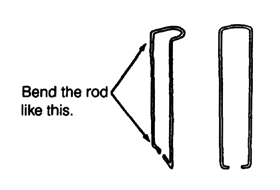
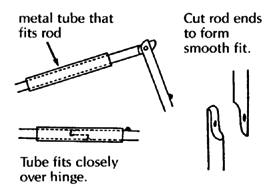
BRACES THAT FOLLOW THE SHAPE OF THE LEG
Flat metal bar can be bent to fit the shape of the leg more closely. This is not always necessary but if done well the brace will fit better - especially when the bar is used with molded plastic.
Instructions for bending and fitting the rod are on Page 557.
ADJUSTABLE BRACES
As the child grows, a brace made like this can be lengthened. Teach family members how to do this.
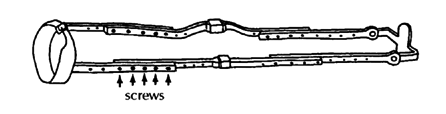
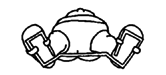
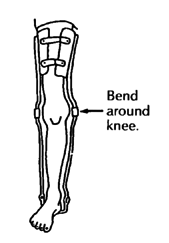
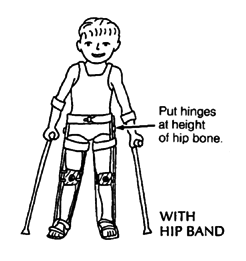
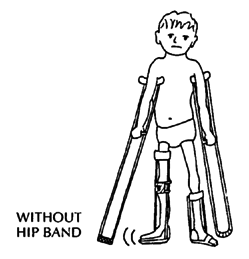
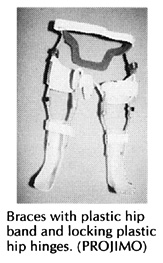
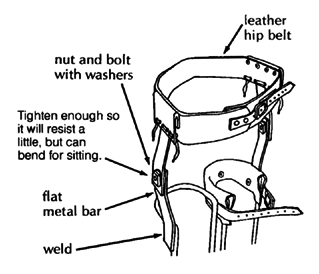
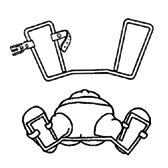
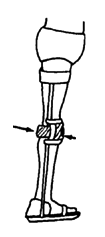
HIP BANDS
Braces with a hip band may be needed for the child:
|
whose leg (or legs) is so weak at the hip that it flops or turns far out to one side, |
or whose legs tend to twist too much inward (or outward).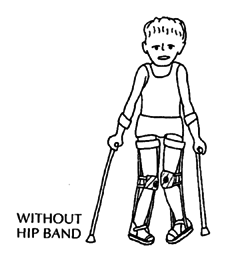 |
|
|
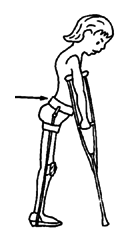
A common problem with hip bands is that the low back bends forward and the butt sticks out. This can cause back problems, and hip contractures. |
A hip band that dips down in back to push in the butt helps prevent this problem. If necessary, add an elastic strap here. |
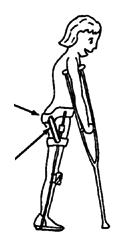
The back of the hip band can be made of thin metal lined with leather, or of strong plastic.

On plastic braces the side bars and hinges can also be made of thick, strong plastic. This adds some flexibility, which will be better for some children but not provide enough support for others.
A child who tends to flop forward at the hips, may need a hip band with a locking hinge.
You can use the design on Page 546.
Hip band without lock
Hip band with lock

|
For a young child whose feet turn in a lot, a night brace to hold the feet (and hips) turned outward may help. It can be made from a thin metal bar or from wood.
|
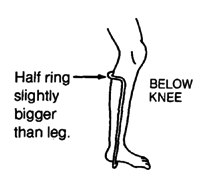
KNEE PIECES (Use the design on Page 543.)
|
A child with a weak leg that straightens normally, |
needs a slightly loose strap behind the knee,
and a firm, comfortable knee piece. |
A child with a leg that does not quite straighten, |
needs a knee piece that firmly pulls the knee back. |

|
A child with a knee that bends backward,
|
needs a firm strap behind the knee that lets the knee go back only a little.
|
For children with a severe back-knee problem, it is often better to use a plastic brace that distributes pressure over a wide area above and below the knee. (This is more comfortable than a behind-the-knee strap that presses only on a small area.) |
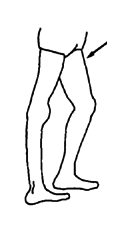
A leg that bends in at the knee,
needs a knee piece that pulls the knee outward,
and also one that pulls the knee back (as shown above).
A leg that bends out at the knee,
needs a knee piece that pulls the knee inward,
and also one that pulls the knee back.
|
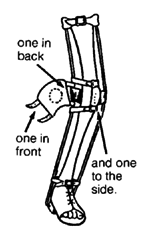
When necessary you can use 3 knee pieces:
|
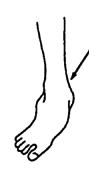
ANKLE STRAPS
For an ankle that bends out, use a strap that pulls the ankle in.
A sole raised on the outer side may also help.
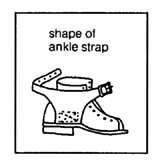
For an ankle that bends in, use a strap that pulls the ankle out.
A sole raised on the inner side may also help.

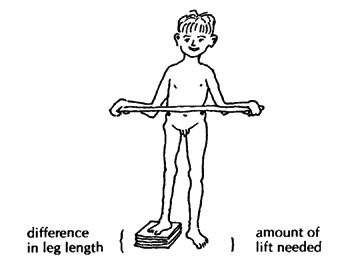
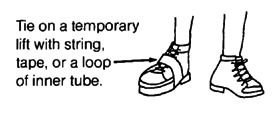
RAISED SOLES OR 'LIFTS' for one leg that is shorter
(For instructions on measuring leg length difference and for homemade measuring instruments, see Page 34.)
For a child who has one leg shorter than the other.
Measure the difference in leg length.
Make the 'lift' of the sole about 1 cm. shorter than the difference in leg length.
|
Note: Almost all children have one leg that is a little shorter than the other, and this does not usually affect how they walk. Raised soles ('lifts') are usually not needed if the difference in leg length is less than 2 cm. However, a child who drags a foot because his hips tilt down on that side may be helped by a small lift on the other side-even if that leg is the same length or longer (See Page 163.) |
IMPORTANT: Before putting a permanent lift on a shoe or sandal, test it by tying or taping on a temporary lift. Watch the child walk and ask how he likes it. You may want to try several heights before deciding on the one that works best.
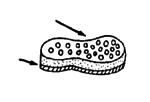
Material used for lifts should be as lightweight as possible. You can use cork or a light, porous rubber. If the material is heavy but strong, to make it lighter you can drill holes through it. Put a thin, strong sole on the bottom.
For a lift with a stiff-ankle brace, the child can often walk more smoothly with a 'rocker-bottom' sole.
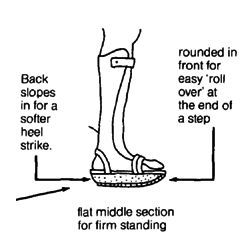
A child with a mild to moderate 'back-knee', may be helped by a heel that extends backward. This helps push the knee forward when the child puts her weight on her foot.
For a more severe back-knee, the child may need a long-leg brace (See Page 67and 548.)
|
A high lift, when needed, can be built into a bar brace.
|

|
Ask a local shoe or sandal maker to teach you how to fasten on the soles and lifts. |
PLASTIC BRACES
Below the knee
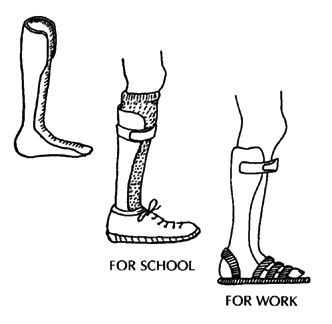
For most children who need a below-knee brace, plastic braces molded to fit the leg and foot of the individual child have many advantages:
-
They are lightweight and often more comfortable than metal braces.
-
They fit the child comfortably and exactly (if made well).
-
They can be worn with ordinary shoes or sandals, which can be easily changed when they get worn out or wet. Shoes can be changed for school and for work.
-
They are water resistant and easy to clean.
-
They are less noticeable than metal braces. If desired, socks can be worn over them to hide them.
-
Children usually prefer them and are more likely to keep wearing them.
Although a little more equipment and skill are needed to make plastic braces, once a village worker has learned the basic technique, they can be made as quickly and easily as a simple metal brace with a clog.
A disadvantage to plastic braces is that usually after a year or two the plastic 'gets tired' and breaks. However, growing children need larger braces fairly often. It is wise to keep the plaster mold of each child's brace so that a new brace can be easily made if needed.
|
A suggestion to save time and money:
Keep the mold of the child's foot - or have the family keep it. |
The biggest expense in making plastic braces is the plaster bandage used for casting a mold of the leg. The cost can be reduced a lot by making your own plaster bandage material (see Page 569).
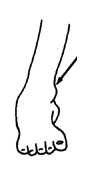
Plastic braces can feel uncomfortable in hot weather and can lead to skin irritation and fungus infections if care is not taken. They can be made cooler by drilling 'breathing holes' in them. Or cut out a hole in the back.
Sometimes if you cut a hole out behind the heel, the brace rubs less and is more comfortable.
CAUTION: Do not put breathing holes in the lower part of the brace which has to be the strongest.
To prevent skin irritation, it is important to bathe daily. It also helps to wear cotton (not nylon) stockings under the brace and to use clean stockings every day.
How to make plastic braces
Here we describe 2 methods for making molded plastic braces:
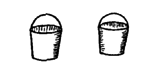
The first method uses old plastic buckets or containers, and needs less equipment. Unfortunately, these braces tend to break easily when used for walking. However, they make excellent, low-cost night braces(to wear while sleeping).
The second method uses sheets of polypropylene plastic. Additional equipment (such as a vacuum sweeper) is needed, and it is a little more expensive. However, the result is a high- quality brace that can last for months or sometimes years.
Method 1: Plastic bucket braces
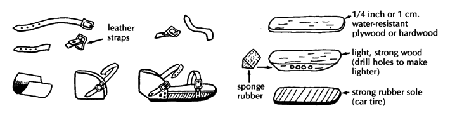
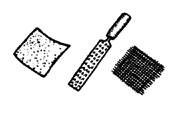
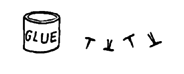
Equipment and materials needed:
|
|
|
|
|
|
|
|
|
|
|
|
|
|
|
|
|
|
|
|
|
|
Making the plastic-bucket brace consists of 3 main steps:
A. Making a hollow plaster cast of the child's leg
B. Making a solid plaster mold of the leg
C. Heat-molding the plastic-bucket brace
|
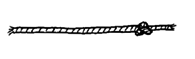
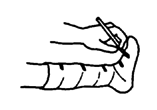
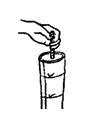
A. Making the hollow cast 1. Tie a knot in the end of a soft rope
2. Put the rope on top of the leg with the knot between the toes.
3. Put the stocking tightly on the foot with the rope inside (or wrap it with a thin cloth). Avoid wrinkles.
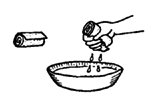
Make sure the rope stays very straight. 4. Wet a plaster bandage and squeeze out the extra water.
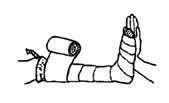
5. Wrap on a thin cast (about 3 layers) while someone else holds the foot in a good position. Be sure the heel is covered with several layers.
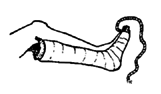
6. While the plaster is still wet, smooth it gently with moist hands, and press the cast gently into all the hollows of the fool.
7. Before the plaster becomes firm, place the foot in exactly the position that you want the brace to hold it in. Sometimes it works well to hold the foot in your hands. But often it works best to have the child step firmly on the floor, or on a padded board.
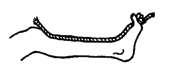
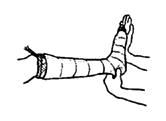
Be sure to position the leg straight up, from side view and front view. 8. Draw some lines over the front of the cast.
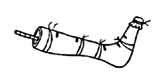
9. When the cast is almost firm but still damp (usually in 5 to 10 minutes), carefully cut through the plaster over the rope. Take care not to cut the child.
10. Then gently remove the cast without changing its shape.
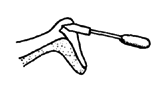
11. Quickly (before it is fully hard) close the cast, line up the lines you drew, and tie it shut with cloth or string. 12. Tie a cloth tightly over the opening of the toes.
|
|
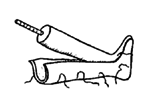
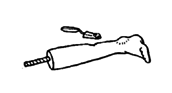
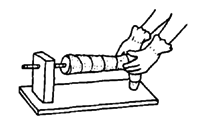
B. Making the solid plaster mold 1. Put a bent piece of rod into the hollow cast.
2, Hold the cast in a standing position - perhaps in a box of sand.
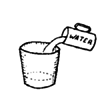
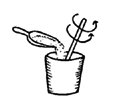
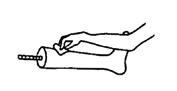
3. Mix the plaster: Put water in a container, enough to fill the cast.
While stirring, sprinkle dry plaster into the water. Keep adding until the mix is just thick enough that wrinkles stay a moment on the surface.
4. Quickly pour the mix into the cast. Jiggle the rod and tap the cast to be sure the mix fills all spaces.
5. Hold the rod in the middle until the plaster is firm.
6. After plaster hardens fully (about one hour) remove the solid mold.
7. Being careful not to change the shape or size of the mold, use fresh plaster to fill in any holes or pits that are not caused by the shape of the foot. Add a little fresh plaster over bony places (so final brace will not rub).
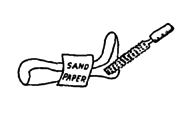
8. Smooth the surface (with a file, piece of wire screen, or piece of broken glass). Do not reduce any of the bumps caused by the bones.
|


|
C. Heat-molding the plastic-bucket brace 1. Mark on the child's leg the shape of the brace.
2. Take measurements as shown for the width and length of the brace.
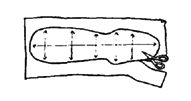
3. Draw an outline on paper, according to the measurements and cut out the pattern.
4. Mark the pattern on the plastic.
5. Cut out the pattern with a saw or strong scissors.
6. Make V-shaped cuts here to help bend the hot plastic around heel.
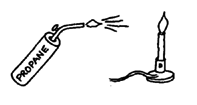
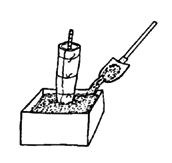
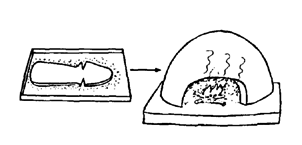
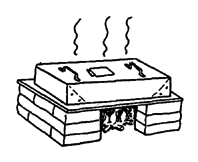
7. Heat the oven to at least 450 ° F (230° C). If you cannot measure or control heat, put a small piece of plastic into the oven and heat it until the plastic becomes soft and gooey.
8. Heat the plaster leg cast in the hot oven for 15 to 20 minutes.
9. Put the hot mold on the rack.
10. Lightly sprinkle dry plaster or talc on a metal sheet or tray. 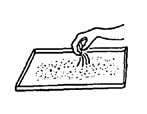
11. Put the plastic form on tray and put the tray into the hot oven. 12. Leave it in oven only until plastic becomes somewhat flexible.*
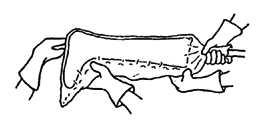
13. Take hot plastic out of oven with gloves. Bend it over the hot mold.
14. With strips of rubber, wrap plastic tightly to force it against the mold.
15. And put it back into oven until plastic gets softer.*
16. Remove from hot oven and press forcefully (with gloves) to fuse overlapped plastic at heels.
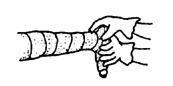
17. Also press in any hollows around bones and on bottom of foot. Keep pressing until plastic begins to cool and stiffen.
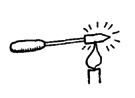
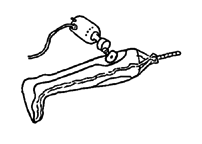
18. While brace is cooling, heat soldering iron. Heat to moderate heat - not red hot. 19. Unwrap cloth from brace while still warm and use soldering iron to smooth and weld heel joint.
20. When cool, trim and smooth the edges of the brace.
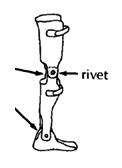
21, Glue or rivet a strap near the top of the brace. For night splints, add 1 or 2 more straps at the ankle and foot.
For easier fastening, use Velcro straps.
For day use or use with sandals or shoes, only the upper strap is needed. Note: Braces made from plastic buckets or containers tend to break fairly easily if a larger child uses them for walking. It is better to use polypropylene plastic (see next page). |

Method 2: Polypropylene braces
Polypropylene is a special plastic available in large sheets from orthopedic supply stores and some plastic factories. For most braces, sheets 30 cm. by 60 cm. (1 foot by 2 feet) are large enough. Thickness should be 3 mm. (1 /8 inch) for thinner, more flexible braces and 4 mm. to 5 mm. (3/16 inch) for stronger, less flexible braces.
|
Polypropylene, where available, is usually the best plastic for braces. It is flexible but strong. It is easy to stretch and mold when hot. Cost is US $1.00 to $2.00 per brace Polyethylene can also be used but is more likely to wrinkle like bacon if it gets too hot. You can experiment with whatever plastic you find. A program in Pakistan uses plastic bus windows, although this hard clear plastic (Plexiglas) is more difficult to stretch and shape when hot. |
This method is the one used by professional brace makers. Here we simplify it as much as possible. Equipment and materials needed are mostly the same as in Method 1 (see Page 551). However, high-quality braces can be made more easily with a few extra pieces of equipment (they are not absolutely necessary). This extra equipment includes:
· special oven*
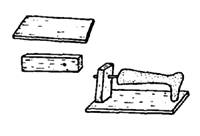
SIMPLE SHEET-METAL BOX OVEN
(riveted or soldered together)
sheet of metal (preferably aluminum, because it spreads heat best) at least 6 mm. (1 /4 in. to 1/2 in.) thick.

It you can get it, rivet a piece of 'Teflon' cloth over the metal sheet. This will help keep the hot plastic from sticking to the metal, Or you can use a Teflon spray.
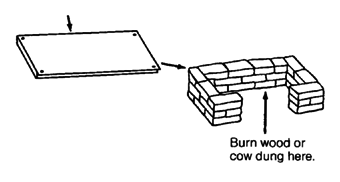
The 'oven' can be placed over any source of heat. Use the cooking fire, or you may want to build a simple fireplace to support it.
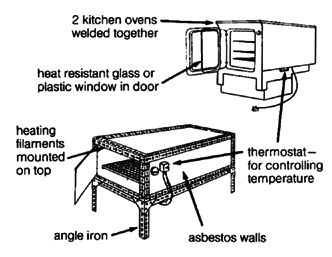
COMPLEX GAS OR ELECTRIC OVENS
(designs from Huckstep's Poliomyelitis.)
· vacuum sweeper
(if electricity is available) or other form of suction. (The suction pulls the hot plastic tightly against the cast until it cools. However, this is not absolutely necessary.)
· metal pipe
Tape it to the end of the vacuum sweeper hose.
The pipe should be a little bigger than the rod used in the leg cast. By bending the rod slightly, it will fit very tightly into the pipe.
Figure out some way to clamp or bolt the pipe firmly to a strong bench or table.
Put 2 notches in the pipe so it will breathe when pushed up against the plaster.
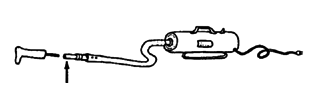
· electric cast-cutter
These are very expensive but a great help if you are making a lot of plastic braces.
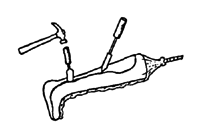
If you do not have a cast-cutter you may have to use a hammer and chisel to cut the plastic. You can heat the chisel so that it will melt the plastic.
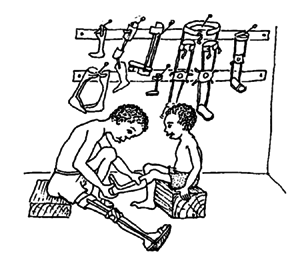
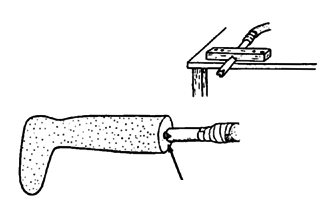
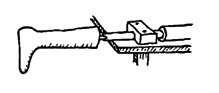
*Some brace makers in Pakistan use no oven, but simply hold the plastic sheet over a 'chula' (earth pot) of hot coals. See photo on Page 538.
|
Making the polypropylene (or polyethylene) brace Steps A and B are the same as described for Method 1 (see Page 552). Step C. Heat-molding the plastic brace 1. Put the rod of the plaster mold into the vacuum pipe. Be sure it is very tight. (If not, take it out and bend the rod a bit more.)
2. Stretch stockinette or stocking tightly over the cast and tape it to the pipe.
3. Sprinkle dry plaster powder or talc over the entire foot and smooth it with your fingers.
4. Preheat the 'oven' and sprinkle plaster powder or talc evenly over the hot metal sheet.
5. Cut a piece of polypropylene plastic large enough to stretch around the entire foot, and put it into the oven to heat.
6. As the plastic gets hot enough to mold, it will turn clear so you can easily see through it It often gets clear in the middle first.
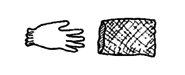
7. To move the hot plastic, 2 persons must wear thick gloves. Sprinkle dry plaster powder, lime, or talc on them.
8. As the plastic is getting hot, turn on the suction (vacuum cleaner) and listen for a hissing sound where the pipe joins the cast. (This means the suction is working.)
9. When the plastic is hot enough (clear and limp), remove the oven lid, lift the hot plastic by its 4 corners, and quickly stretch it over the whole cast.
10. Quickly pinch the edges of the plastic together along the bottom side of the leg and around the pipe. Squeeze together all edges to form a seal. You must work quickly to complete the seal before the plastic gets too cool.
As soon as the seal is complete, the suction should pull the hot plastic close against the cast. But if necessary, help by pushing it into the hollows.* 11. While the plastic is still hot and soft, cut off the extra with a sharp knife or strong scissors.
12. After it cools, draw the form of the brace on the plastic,
13. and cut it out either with a cast cutter.
or a hammer and chisel,
or a red hot soldering iron, or however you can. Finish the brace in the way described under Method 1 (steps 20 and 21). |

* If no suction equipment is available, you can heat mold the plastic by stretching it over the cast and pushing in the hollows until it cools. With practice, this gives almost as good results, and you only need about half as much plastic.
Making sure plastic braces fit well and are comfortable
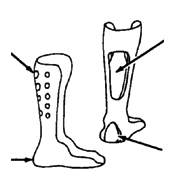
The most common problem with plastic braces is that they press on bony bumps. To avoid this,
put small pads over bony bumps before casting foot. Or, put the pads on the mold, and add a little fresh plaster to the bony bumps before molding the plastic.
When the child wears the plastic brace, if it presses too much on bony places, or elsewhere,
heat a small area over the spot where the bone presses, and with a smooth, rounded stick push the hollow deeper.(Use a heat gun if you have one)
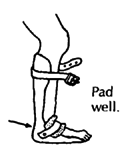
Soft padding
inside the brace can make it more comfortable. Places that may need to be padded are:
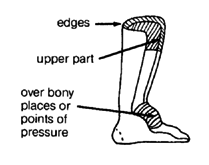
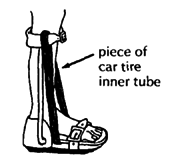
For padding you can use a product called 'moleskin', or a special foam plastic material available from orthopedic supply stores. Or you can glue in pieces of cotton blanket or car inner tube (but make sure the child wears cotton stockings to avoid skin problems).
|
The sole of the brace can end at the ends of the toes (or slightly beyond to allow for growth).
The side of the brace at the foot can extend to the toes if necessary for support |
Or the sole can end at the base of the toes.
For better comfort and shoe fit, the side can dip down around the base of the big toe. |
AVOID brace edges that stop at middle of toes.
Avoid an edge that curves in (better to heat it and bend it out a little). AVOID brace edges that pass across the middle of bony bumps. The edge should be either behind or in front of the bump. |
Deciding how wide or narrow to make the sides of the brace at different points will depend on the needs of the particular child.
|
A child whose ankle or foot is floppy or deformed, or who needs a stiff ankle brace to help push back a weak knee (see Page 557) may need a brace with wide sides at the ankle and foot.
|
A child who needs only the ankle stabilized may walk better with a brace that lets the front of the foot bend up and down a little.
|
Many children benefit by a brace that allows some up and down ankle movement but prevents sideways movement. This can be done by cutting back the sides of the brace here. This will be the weak point in the brace. So, the plastic must be extra thick here.
|
Or you can strengthen it by putting extra strips of hot plastic on the back of the plaster mold before stretching the whole plastic over it. |
Different plastic brace models for different needs
In various places in this book we have shown different brace models and how they meet the particular needs of a child. See, for example, Page 66 to 73 and Page 116. Here are a few more ideas for different plastic braces:
Below-knee brace that gives knee support
The child with a weak upper leg whose knee cannot support her full weight, may be helped enough by a brace that pushes her knee back.
A strong stiff ankle on the brace, with the foot tilted down slightly (more than 90°C), pushes the knee back when she steps.
Front of brace presses against knee.
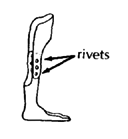
The simplest way to make this brace is to rivet the seam where the plastic joins in front. (See photo, Page 550.)
CAUTION: The shoe or sandal may affect the angle of the foot. Allow for this when deciding the angle for the foot of the brace.
|
A similar brace can be made in 2 parts. 1. Make the lower part, and place it back on the plaster mold.
2. Place the mold like this and form the top part of the brace over the lower part. When the child grows, this brace can be made longer by removing the rivets and separating the 2 ends more.
|
Side-support knee brace
A brace that supports the knee may help a child that has a sideway bend or partial dislocation of the knee.
Above-knee plastic braces
The simplest kind of above-knee plastic brace is a single piece without a knee hinge.
You can make it in the same way as a below-knee brace, with or without a footpiece. These braces are useful on small children.
|
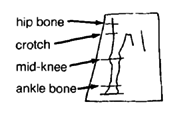
To make a jointed above-knee brace: 1. Draw the shape of the child's leg on paper.
2. Mark the height of the
3. After forming the plastic pieces on plaster molds, bend metal joint pieces so they fit the shape of the leg.
To bend the flat bar, make or buy a bending iron.
4. Temporarily pin or bolt the plastic pieces to the metal pieces. Then you can adjust the front-to-back angles with the brace on the child.
5. When the angles are right, mark the position, and after checking all aspects of fit, rivet the pieces together and add straps and knee supports.
Hinged braces can also be made using the plastic itself for knee hinges, and even ankle hinges However, these hinges may not last long with heavy use.
|
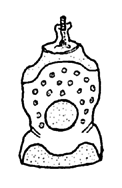
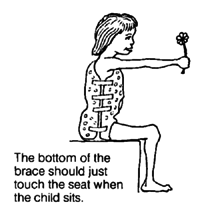
BODY SUPPORTS
In most cases, a body brace or body jacket probably does little or nothing to correct or prevent further curving of the spine. However, a child with a 'flail' spine that curves so much that it makes sitting difficult or awkward, may sit more comfortably and have more use of her arms if she has a body brace.
|
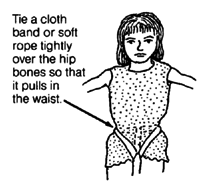
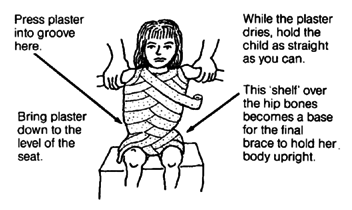
Making a plastic body brace 1. Put small pads over upper outer corners of hip bone.
2. Put a stockinette or old tight-fitting shirt on the child.
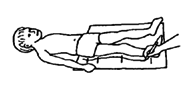
3. Cast the child's body with plaster bandage while holding her in a sitting position.*
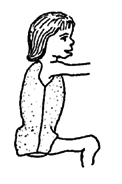
4. Cut the cast into 2 halves and remove.
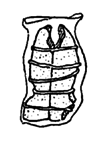
5. Tape or tie the 2 halves of the cast together and put it into a plastic bag.
6. Make a solid plaster mold inside the cast (see Page 552).
You can make it lighter and save plaster by mixing sawdust or bits of plastic foam into the plaster 7. Remove the plaster mold and smooth it carefully to keep its shape, especially the waist and hip curves.
8. Stretch hot plastic over the mold as described on Page 555. If your oven or sheets of plastic are not big enough, you may have to mold it in 2 halves, front and back.
9. Mark and cut the plastic. Leave a little room under arms. Cut breathing holes and perhaps a large central hole over the stomach. 10. Try it on the child. Make adjustments. Smooth edges. Add padding and straps.
A body brace attached to leg braces may be needed by a child whose body is weak from the chest down.
|
* Casting can also be done with the child lying lengthwise over a wide strip of cloth stretched between two points.
Disabled Village Children
A guide for community health workers,
rehabilitation workers, and families
by David Werner
Published by
The Hesperian Foundation
P.O. Box 11577
Berkeley, CA 94712-2577