Disabled Village Children
A guide for community health workers,
rehabilitation workers, and families
PART 3
WORKING IN THE SHOP:
Rehabilitation Aids and Procedures
CHAPTER 59
Correcting Joint Contractures
In this chapter we discuss different aids used for gradually straightening limbs that have joint contractures.
Information on contractures, their causes and prevention is in Chapter 8. Exercises to prevent and correct contractures are in Chapter 42. For other references to contractures, see the Index, Page 647.
Joint contractures can often be gradually straightened with casts or braces that gently but firmly hold the joint in a stretched position for a long time. We stress gently because unless great care is taken it is very easy to cause injuries.
|
To straighten a limb, 3 areas of pressure are needed.
|
|
In theory, the leg could be straightened like this.
|
|
In fact, this would cause pressure sores on the small areas where the splint presses.
Also, the knee could be dislocated if the calf is not supported while stretching. |
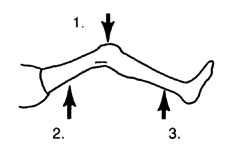

Always use wide areas of pressure. Avoid pressure on the knee, behind the heel, and over bony areas.

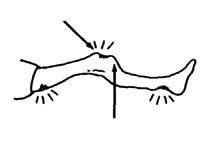
If a child stays in bed, a stretching aid like one of these might work. (But try to keep the hip straight, so that the aid does not cause a hip contracture while it straightens the knee.)
There are several ways to straighten contractures that let the child continue to move about. These include:
1. a series of plaster casts
2. adjustable braces
3. elastic stretching aids of bamboo or inner tube
4. adhesive strapping
The advantages and disadvantages of the first 3 ways are discussed on Page 85. It is important that you read this before deciding which one to use for a particular child. The 4th method (strapping) is used mostly on clubbed feet of newborn babies (see Page 565).
HOW TO CORRECT CONTRACTURES USING PLASTER CASTS
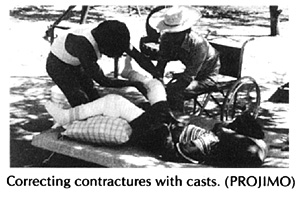
The example we give here is for the knee, but the basic methods are the same for contractures in ankles, feet, elbows, and wrists.
Casting the leg
FIRST WEEK

1. Put stockinette or a close fitting cotton stocking on the leg. Avoid wrinkles.
2. Put cast padding or cotton roll (or wild kapok) evenly around the leg.
3. To protect the knee, it helps to put a soft sponge or piece of sponge rubber over the knee.
4. Put extra padding around the thigh, the knee, and the ankle.
5. Put a plaster cast on the leg. Be sure it reaches high up the thigh.
6. Put lengthwise strips of plaster for reinforcement over the knee.
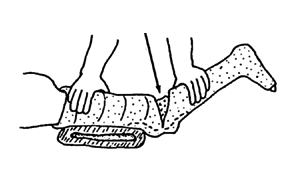
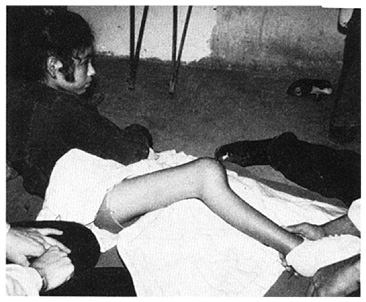
7. Holding the calf below the knee, gently straighten the leg as far as it will go, without using force.
8. Position the foot at a right angle (or as near to it as you can without using force).
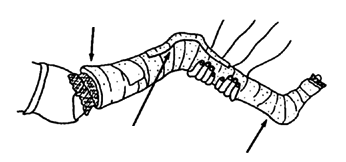
STRAIGHTENING THE CAST WITH WEDGES
The cast is straightened a little every few days. In a small child or a person with recent contractures, it can be done every 2 or 3 days. In persons with old contractures, progress will be slower. To save on costs, change the cast every week or 10 days.
SECOND WEEK
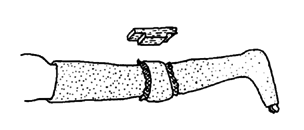
1. Cut through the plaster behind the knee.

Do not cut all the way around.
2. Use steady, gentle pressure so that the leg straightens a little and the cut opens.
3. Hold the cut open with a small wedge of wood.
4. Wrap a piece of cloth around the knee.
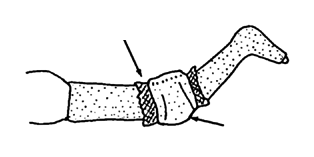
Then wrap a thin ring of plaster around it to keep the wedge in place.
|
CAUTION: When stretching the leg, use gentle, steady pressure until it begins to hurt a little. Do not try to advance too fast, as you may cause permanent damage to nerves, tendons or the joint. For a day or so after stretching, the child may have some discomfort behind the knee. This is normal, unless it hurts too much. You can give aspirin. If the child complains of pain over pressure points or bony bumps, remove the cast or cut open a window in the cast to check if a sore is forming. WARNING: When casting a child who does not feel in his limbs, take great caution to avoid pressure sores, and use very little pressure. |
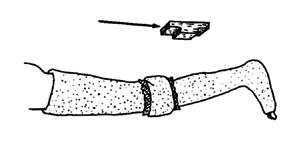
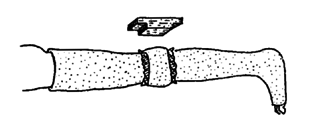
THIRD WEEK
1. Cut and remove the ring of plaster

2. Gently stretch the joint and put in a wider wedge.
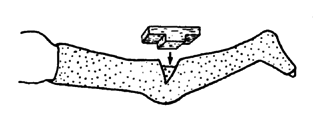
3. And cover it with a new ring of plaster.
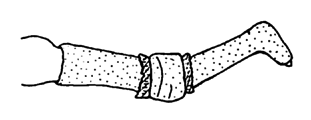
FOURTH WEEK
Each time you change the ring, put in a bigger wedge.
FIFTH WEEK
Continue casting until the knee is completely straight or bends backward just a little. Then use a brace for at least a few weeks (day and night) to keep it straight.
SIXTH WEEK
The time to straighten a contracture may vary between 2 weeks and 6 months-or more. If the leg stops straightening for 3 or more cast changes, stop casting and try to arrange surgery.
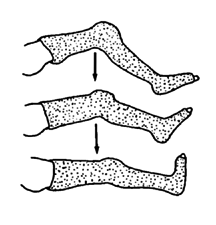
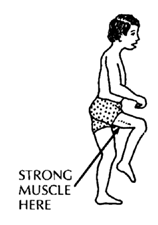
Straightening a leg that is hard to stretch
In an older child who has a knee contracture with strong muscles that bend the knee, it may be hard to straighten the knee more with each cast change.
If the leg does not move when you pull it, ask the child to ...
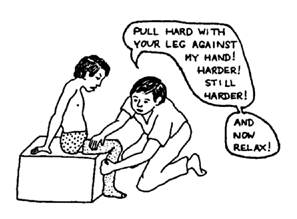
When he relaxes, keep pulling, and the leg should straighten a little.
Repeat this several times while you steadily pull the leg, Each time the knee should straighten a little more.
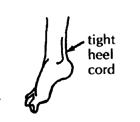
Straightening a tiptoe contracture
|
A foot with a contracture like this,
|
|
can sometimes be straightened with casts and wedges.
|
|
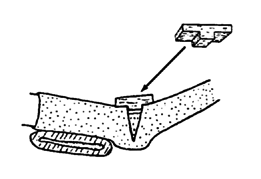
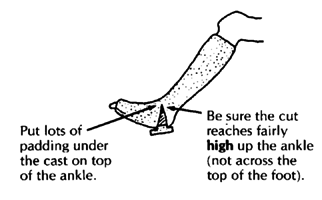
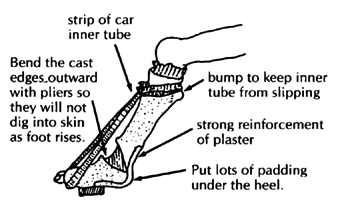
Try to overcorrect the contracture so that it will rest easily at a (90°) right angle when the cast is removed.
|
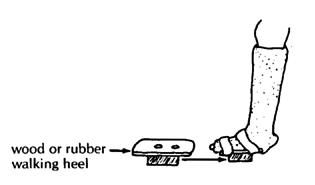
|
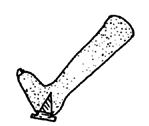
Do not let the child walk on the cast until the day after it is put on -and then only if you put a' walking heel' on it. Otherwise the sole of the cast will become floppy and will not help. Active children need very thick plaster on the bottom of the foot.
|
|
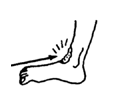
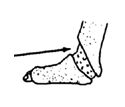
CAUTION: The above method of correcting tiptoe contractures sometimes causes pressure sores here.
To prevent pressure sores, it often works better to cut a complete ring out of the cast. For more precautions, see Page 567, on the casting of club feet. |
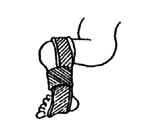
For the child who lives too far away to have her cast changed every few days, you can try to make an aid that will gradually pull the foot up without needing frequent cast changes. Here is one idea:
|
CAUTION: If the child is sent home with a cast, be sure the family knows the danger signs. If any of these appear, have them quickly bring the child back or remove the cast themselves. Danger signs:
To take off the cast without tools, in an emergency, soak it in warm water and unwrap or tear it apart. |
Note: This cast is not as strong as a fully covered one and will not last on a very active child. It will usually only work on a child without much sideways deformity of the foot or ankle. The cast may need to be changed 2 or 3 times as the foot straightens.
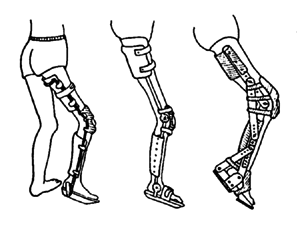
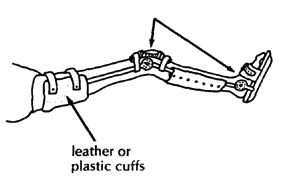
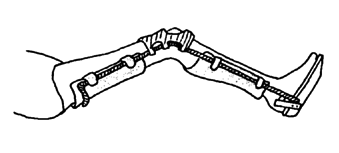
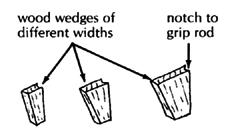
HOW TO CORRECT CONTRACTURES USING ADJUSTABLE BRACES
The advantage of these braces is that children do not have to visit the rehabilitation center so often to have them adjusted. The family can adjust them at home.
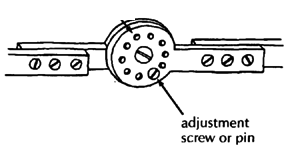
Orthopedic suppliers in some countries sell special knee and ankle joints that can be locked in different positions. But these are very expensive. However, a skilled village craftsperson can put together something similar:
|
Knee and ankle joints can be adjusted every few days to gradually straighten the joints.
|
|
Space the holes on the 2 pieces differently so that lining them up allows a range of small adjustments.
|
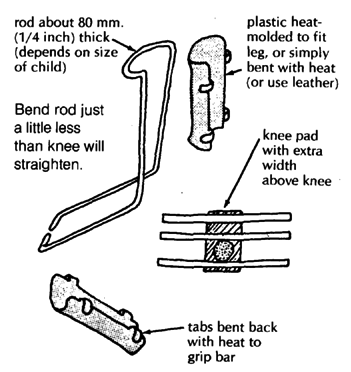
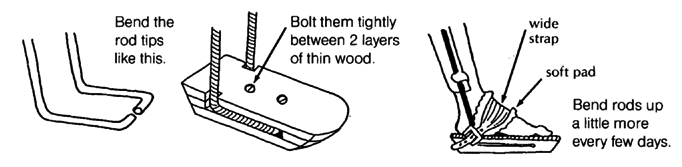
A much simpler low-cost model can be made of round or flat metal bar.
|
Round metal rod (re-bar)
These metal bar braces are used in a way similar to a standard above-knee brace (see Page 543). Every 2 or 3 days, bend the bar a little straighter at the knee. The brace can be made cheaply, and can be removed for walking and exercise, and to check for sores. As the leg becomes straighter, any of these braces can be used as a regular walking brace with a clog.
|
|
Flat metal bar Use flat steel bar that is strong enough to hold leg firmly.
Twist the middle part of the bar in a vise so that it can be bent for easy adjustments.
|
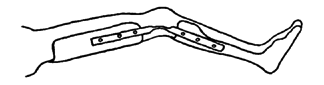
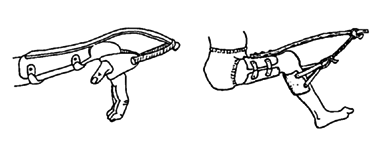
Two designs for adjustable braces to correct ankle contractures
|
1.
Note: This design is complicated to make, but can be adjusted while the brace is on the child. |
|
2. |
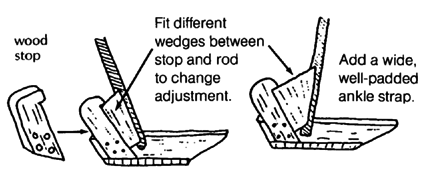
An adjustable wood brace for knee and ankle contractures
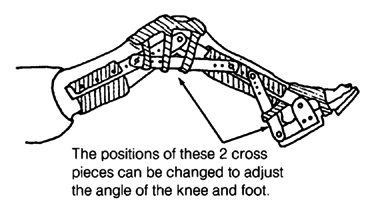
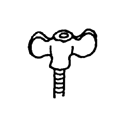
Using 'wing nuts' makes it easier to remove the bolts for clamping the position of the cross pieces.
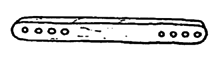
Use thin pieces of hard wood about 2 cm. wide and 6 to 8 mm. thick.
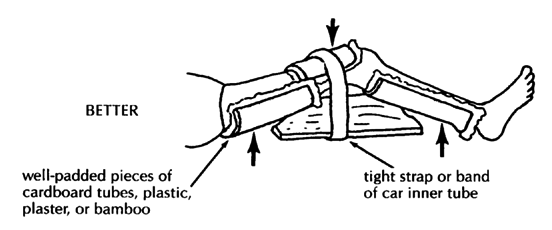
For homemade aids to straighten contractures, using car inner tubes and other elastic or springy material, see Page 85.
|
WARNING: If a knee looks like this, it is probably dislocated. Trying to straighten it could make the dislocation worse. Take great care to put pressure only on the leg just below and behind the knee, not at the foot. Gradually try to correct the dislocation (bring the lower leg forward) before trying to straighten. If possible, get advice or help from an experienced health worker or specialist. |
Disabled Village Children
A guide for community health workers,
rehabilitation workers, and families
by David Werner
Published by
The Hesperian Foundation
P.O. Box 11577
Berkeley, CA 94712-2577